


This post is part 4 in the series ["Hashing out a docker workflow"]({% post_url 2015-06-04-hashing-out-docker-workflow %}). For background, checkout my previous posts.
My previous posts talked about getting your local environment setup using the Drupal Docker image with Vagrant. It's now time to bake a Docker image with our custom application code within the container, so that we can deploy containers implementing the immutable server pattern. One of the main reasons we starting venturing down the Docker path was to achieve deployable fully baked containers that are ready to run in whatever environment you put them in, similar to what we've done in the past with Packer, as I've mentioned in a previous post.
Review
The instructions in this post are assumming you followed my [previous post]({% post_url 2015-09-22-local-docker-development-with-vagrant %}) to get a Drupal environment setup with the custom "myprofile" profile. In that post we brought up a Drupal environment by just referencing the already built Drupal image on DockerHub. We are going to use that same Docker image, and add our custom application to that.
All the code that I'm going to show below can be found in this repo on Github.
Putting the custom code into the container
We need to create our own image, create a Dockerfile in our project that extends the Drupal image that we are pulling down.
Create a file called Dockerfile in the root of your project that looks like the following:
FROM drupal:7.41

ADD drupal/profiles/myprofile /var/www/html/profiles/myprofile
We are basically using everything from the Drupal image, and adding our installation profile to the profiles directory of the document root.
This is a very simplistic approach, typically there are more steps than just copying files over. In more complex scenarios, you will likely run some sort of build within the Dockerfile as well, such as Gulp, Composer, or Drush Make.
Setting up Jenkins
We now need to setup a Jenkins server that will checkout our code and run docker build and docker push. Let's setup a local jenkins container on our Docker host to do this.
Open up the main Vagrantfile in the project root and add another container to the file like the following:
# -_- mode: ruby -_-

# vi: set ft=ruby :

Vagrant.configure(2) do |config|

config.vm.define "jenkins" do |v|
v.vm.provider "docker" do |d|
d.vagrant_vagrantfile = "./host/Vagrantfile"
d.build_dir = "./Dockerfiles/jenkins"
d.create_args = ['--privileged']
d.remains_running = true
d.ports = ["8080:8080"]
d.name = "jenkins-container"
end
end

config.vm.define "drupal" do |v|
config.vm.provider "docker" do |docker|
docker.vagrant_vagrantfile = "host/Vagrantfile"
docker.image = "drupal"
docker.create_args = ['--volume="/srv/myprofile:/var/www/html/profiles/myprofile"']
docker.ports = ['80:80']
docker.name = 'drupal-container'
end
end
end
Two things to notice from the jenkins container definition, 1) The Dockerfile for this container is in the Dockerfiles/jenkins directory, and 2) we are passing the --privileged argument when the container is run so that our container has all the capabilities of the docker host. We need special access to be able to run Docker within Docker.
Lets create the Dockerfile:
$ mkdir -p Dockerfiles/jenkins
$ cd !$
$ touch Dockerfile
Now open up that Dockerfile and install Docker onto this Jenkins container:
FROM jenkins:1.625.2

USER root

# Add the new gpg key
RUN apt-key adv --keyserver hkp://p80.pool.sks-keyservers.net:80 --recv-keys 58118E89F3A912897C070ADBF76221572C52609D

# Add the repository
RUN echo "deb http://apt.dockerproject.org/repo debian-jessie main" > /etc/apt/sources.list.d/docker.list

VOLUME /var/lib/docker

RUN apt-get update && \
  apt-get -y install \
    docker-engine

ADD ./dockerjenkins.sh /usr/local/bin/dockerjenkins.sh
RUN chmod +x /usr/local/bin/dockerjenkins.sh

ENTRYPOINT ["/bin/tini", "--", "/usr/local/bin/dockerjenkins.sh" ]
We are using a little script that is found in The Docker Book as our entry point to start the docker daemon, as well as Jenkins. It also does some stuff on the filesystem to ensure cgroups are mounted correctly. If you want to read more about running Docker in Docker, go check out this article
Boot up the new container
Before we boot this container up, edit your host Vagrantfile and setup the port forward so that 8080 points to 8080:
# -_- mode: ruby -_-

# vi: set ft=ruby :

Vagrant.configure(2) do |config|
config.vm.box = "ubuntu/trusty64"
config.vm.hostname = "docker-host"
config.vm.provision "docker"
config.vm.network :forwarded_port, guest: 80, host: 4567
config.vm.network :forwarded_port, guest: 8080, host: 8080
config.vm.synced_folder '../drupal/profiles/myprofile', '/srv/myprofile', type: 'rsync'
end
Now bring up the new container:
$ vagrant up jenkinsor if you've already brought it up once before, you may just need to run reload:
\$ vagrant reload jenkins
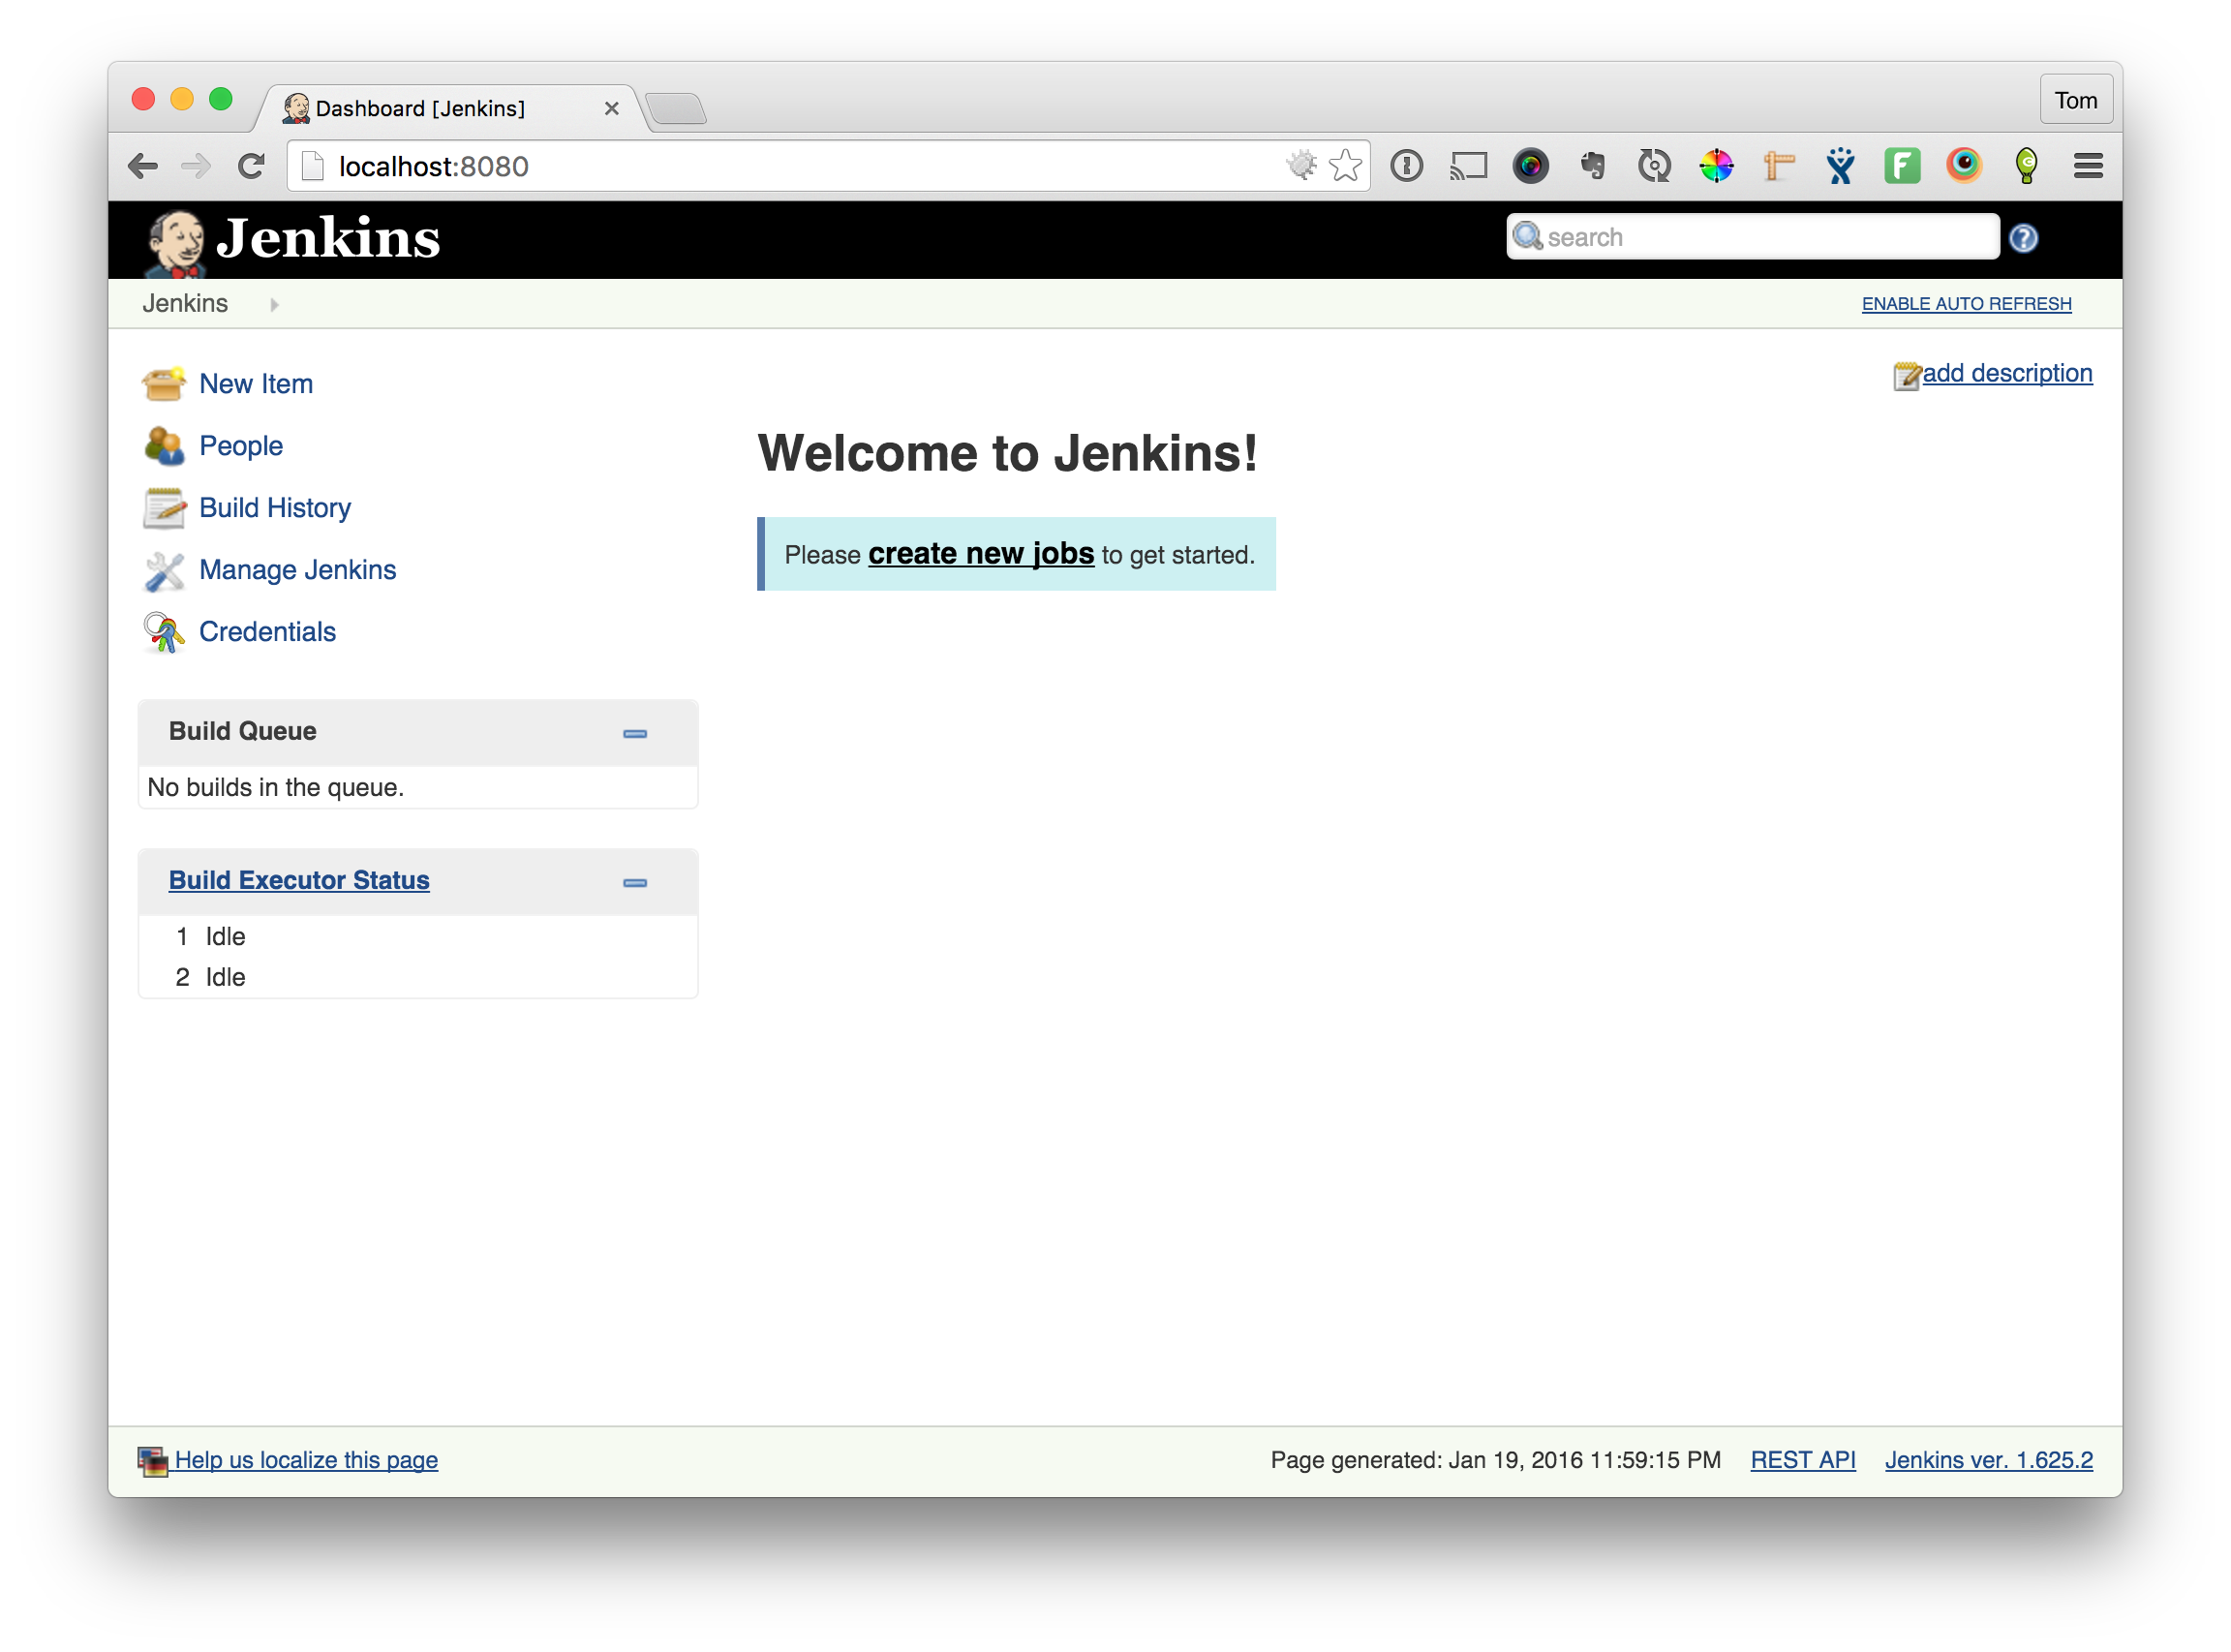
You should now be able to hit Jenkins at the URL http://localhost:8080
Install the git plugins for Jenkins
Now that you have Jenkins up and running, we need to install the git plugins. Click on the "Manage Jenkins" link in the left navigation, then click "Manage Plugins" in the list given to you, and then click on the "Available" Tab. Filter the list with the phrase "git client" in the filter box. Check the two boxes to install plugins, then hit "Download now and install after restart".
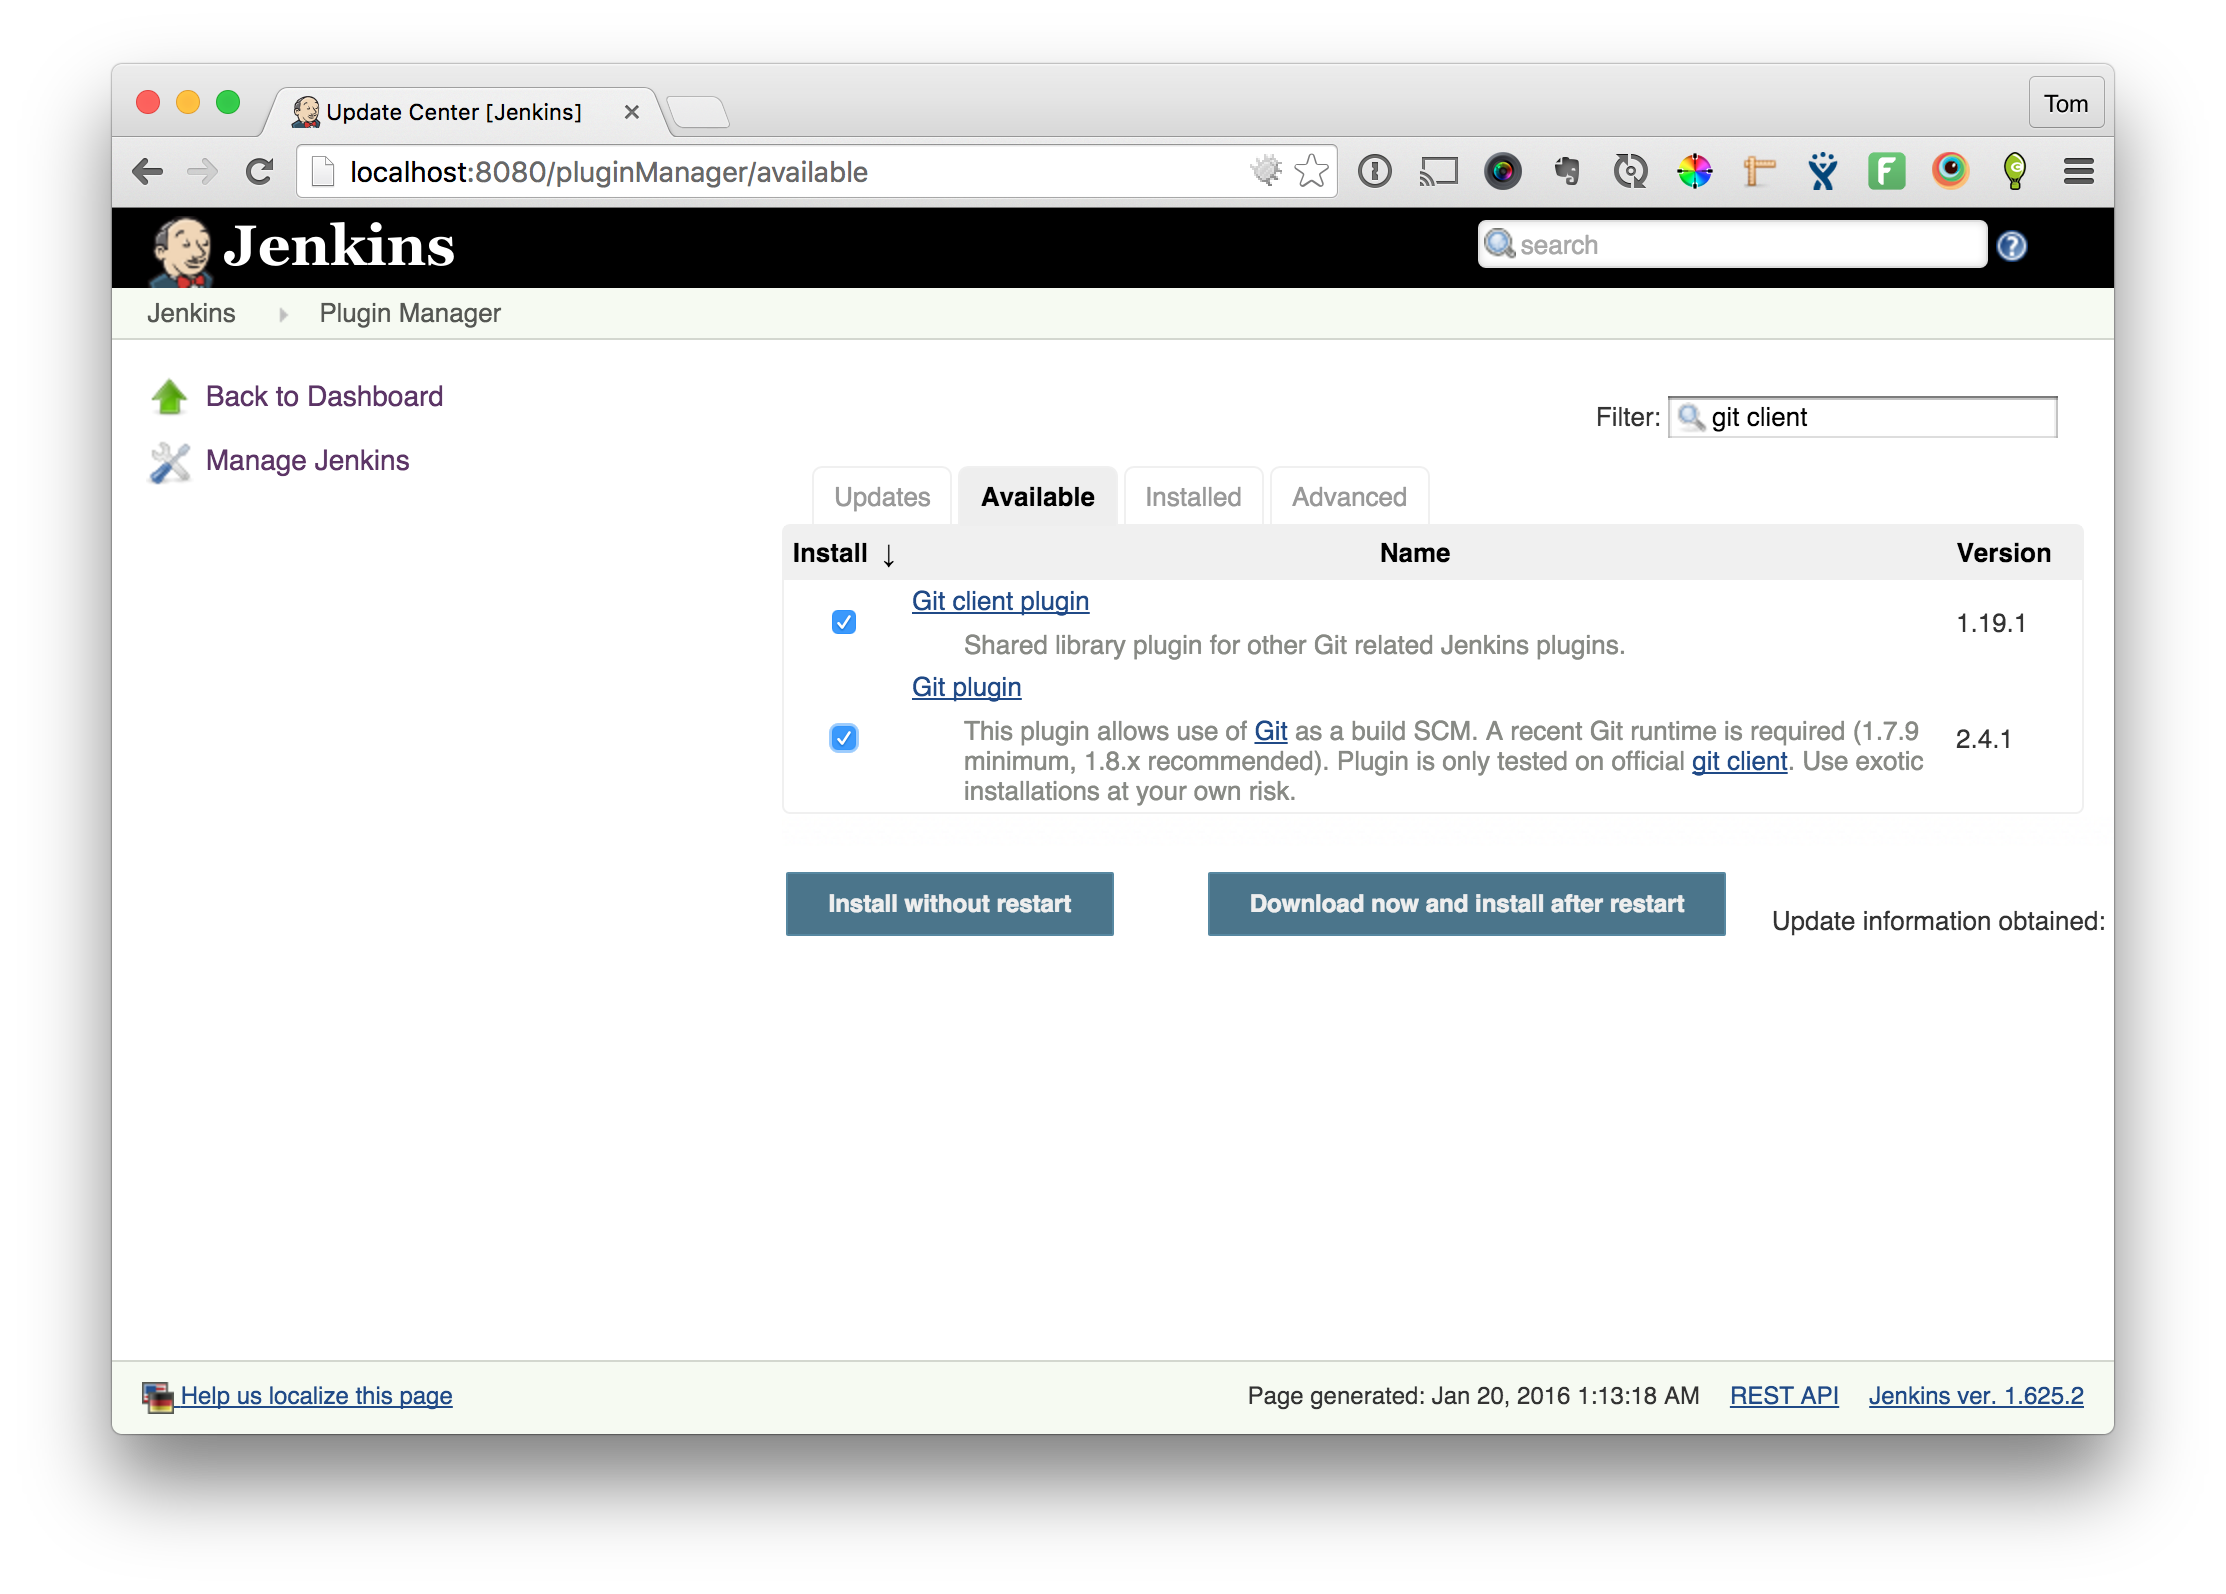
On the following screen, check the box to Restart Jenkins when installation is complete.
Setup the Jenkins job
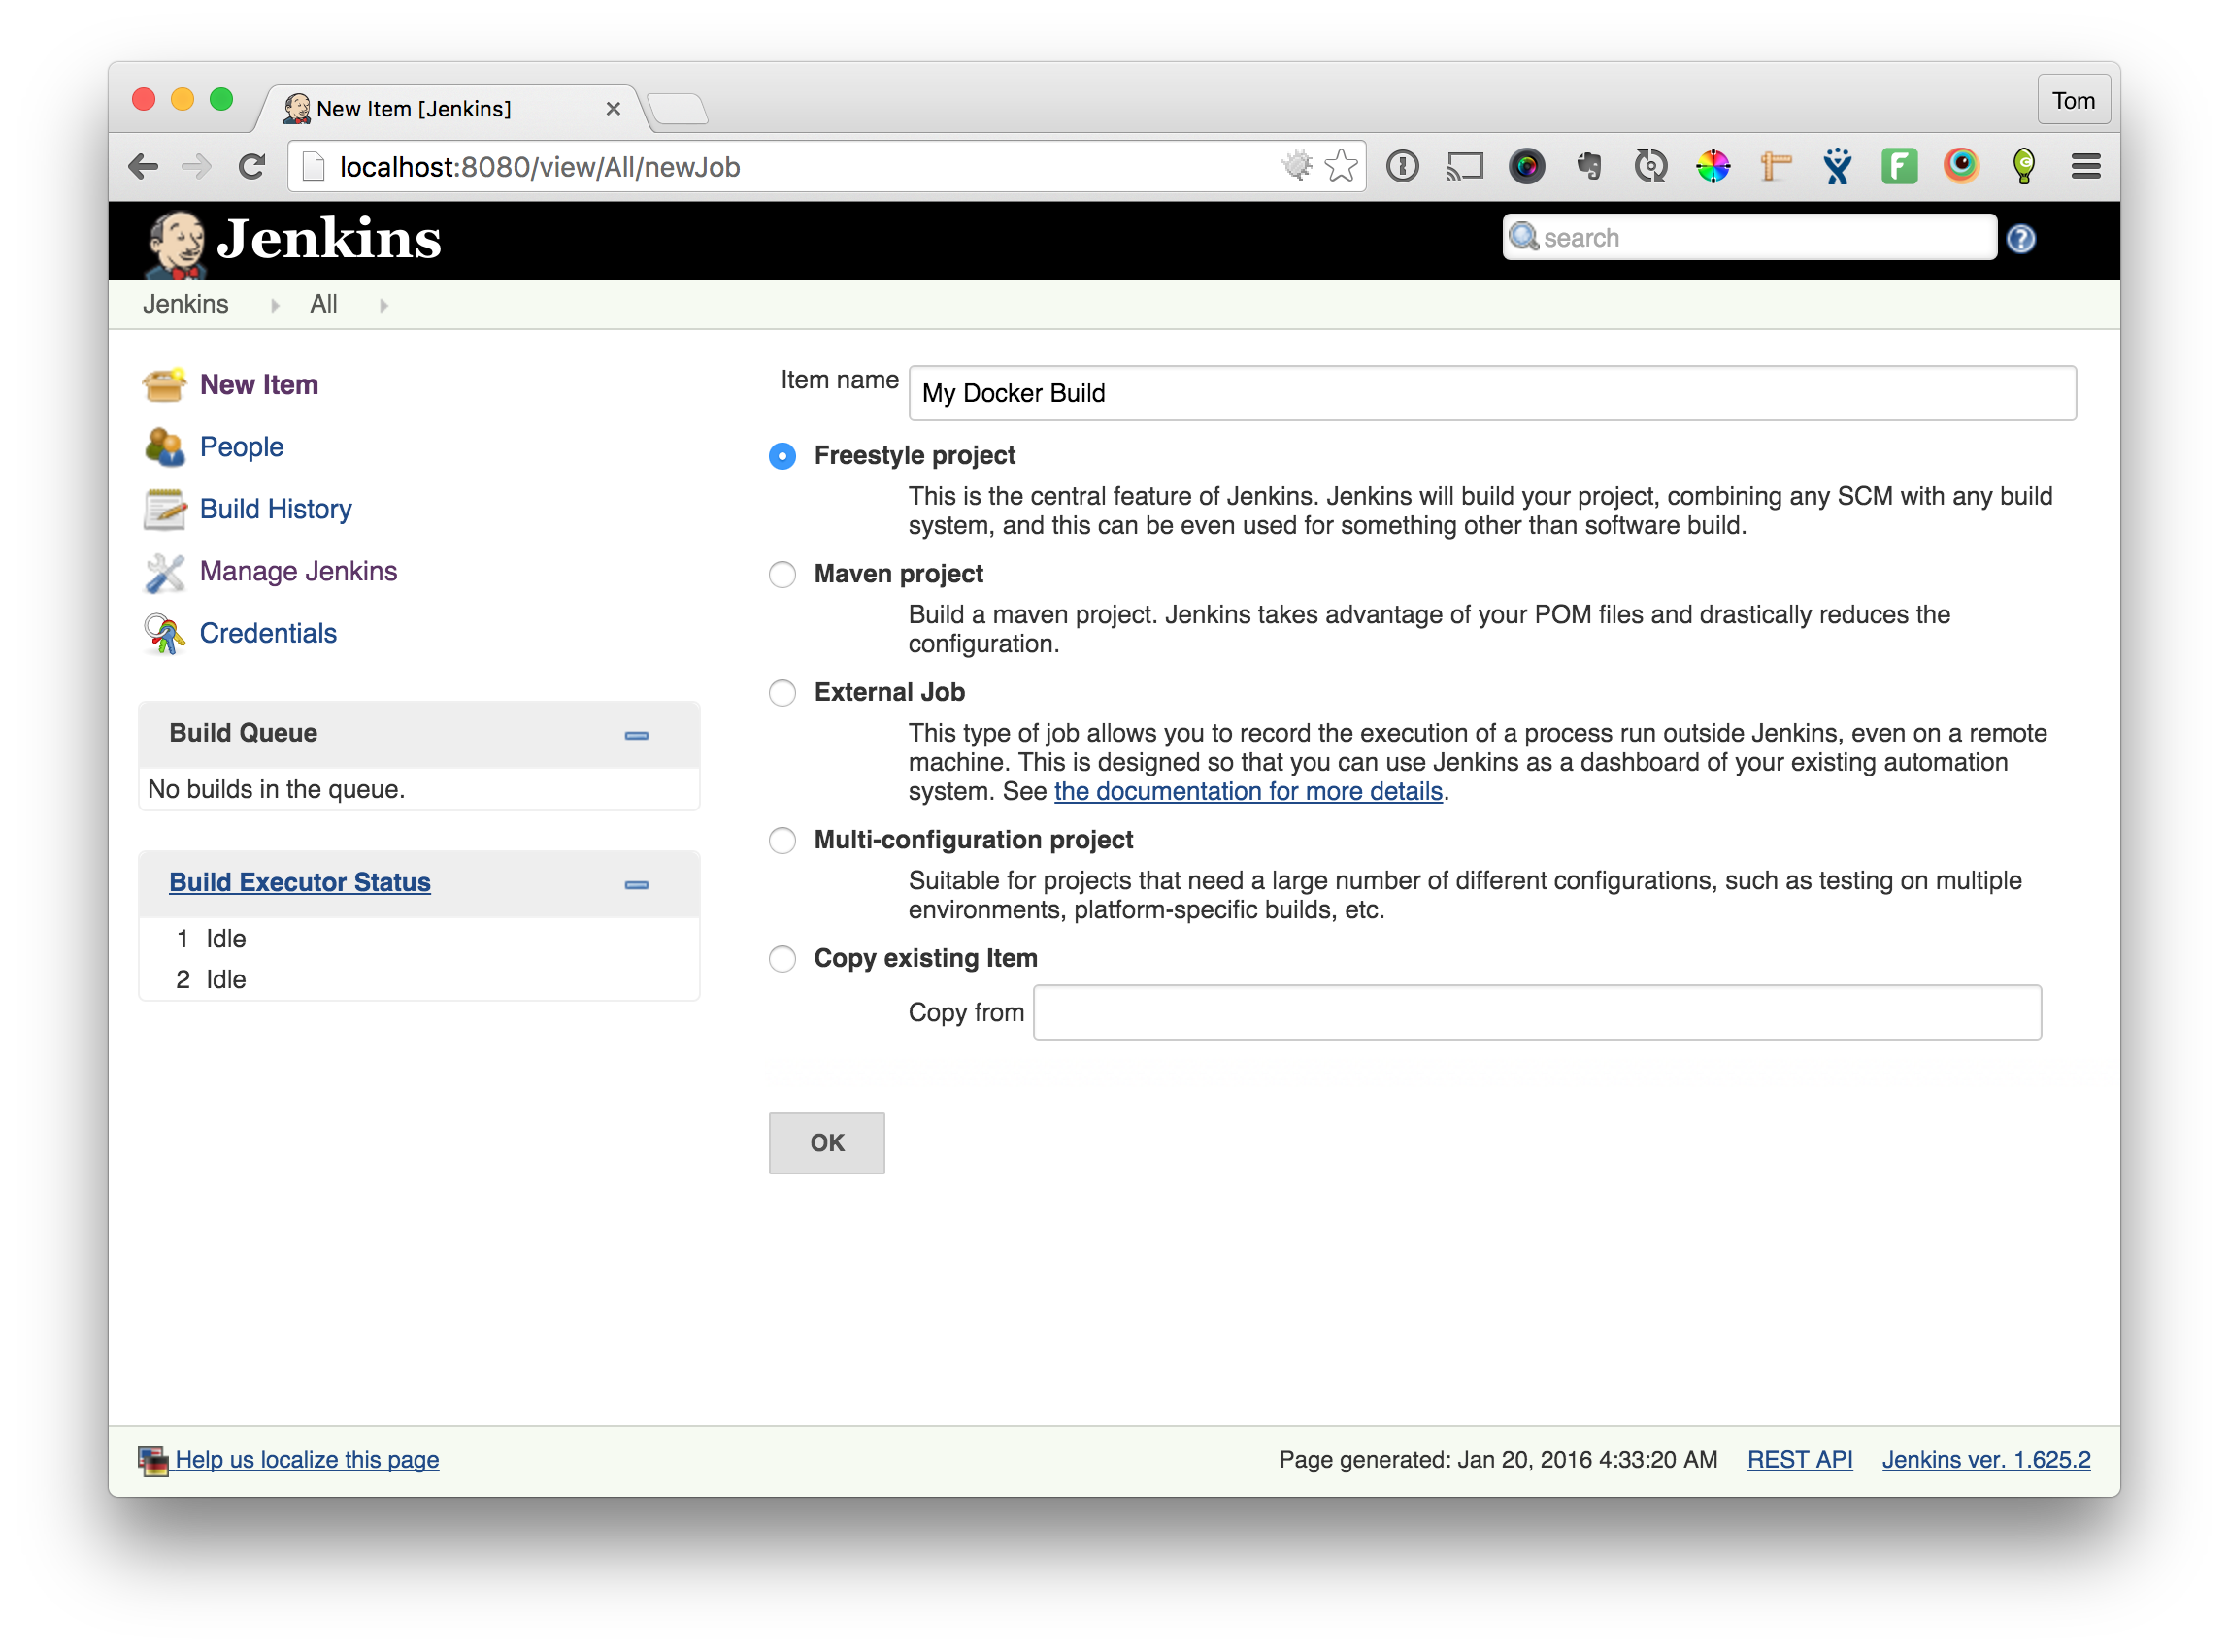
It's time to setup Jenkins. If you've never setup a Jenkins job, here is a quick crash course.
- Click the New Item link in the left navigation. Name your build job, and choose Freestyle project. Click Ok.
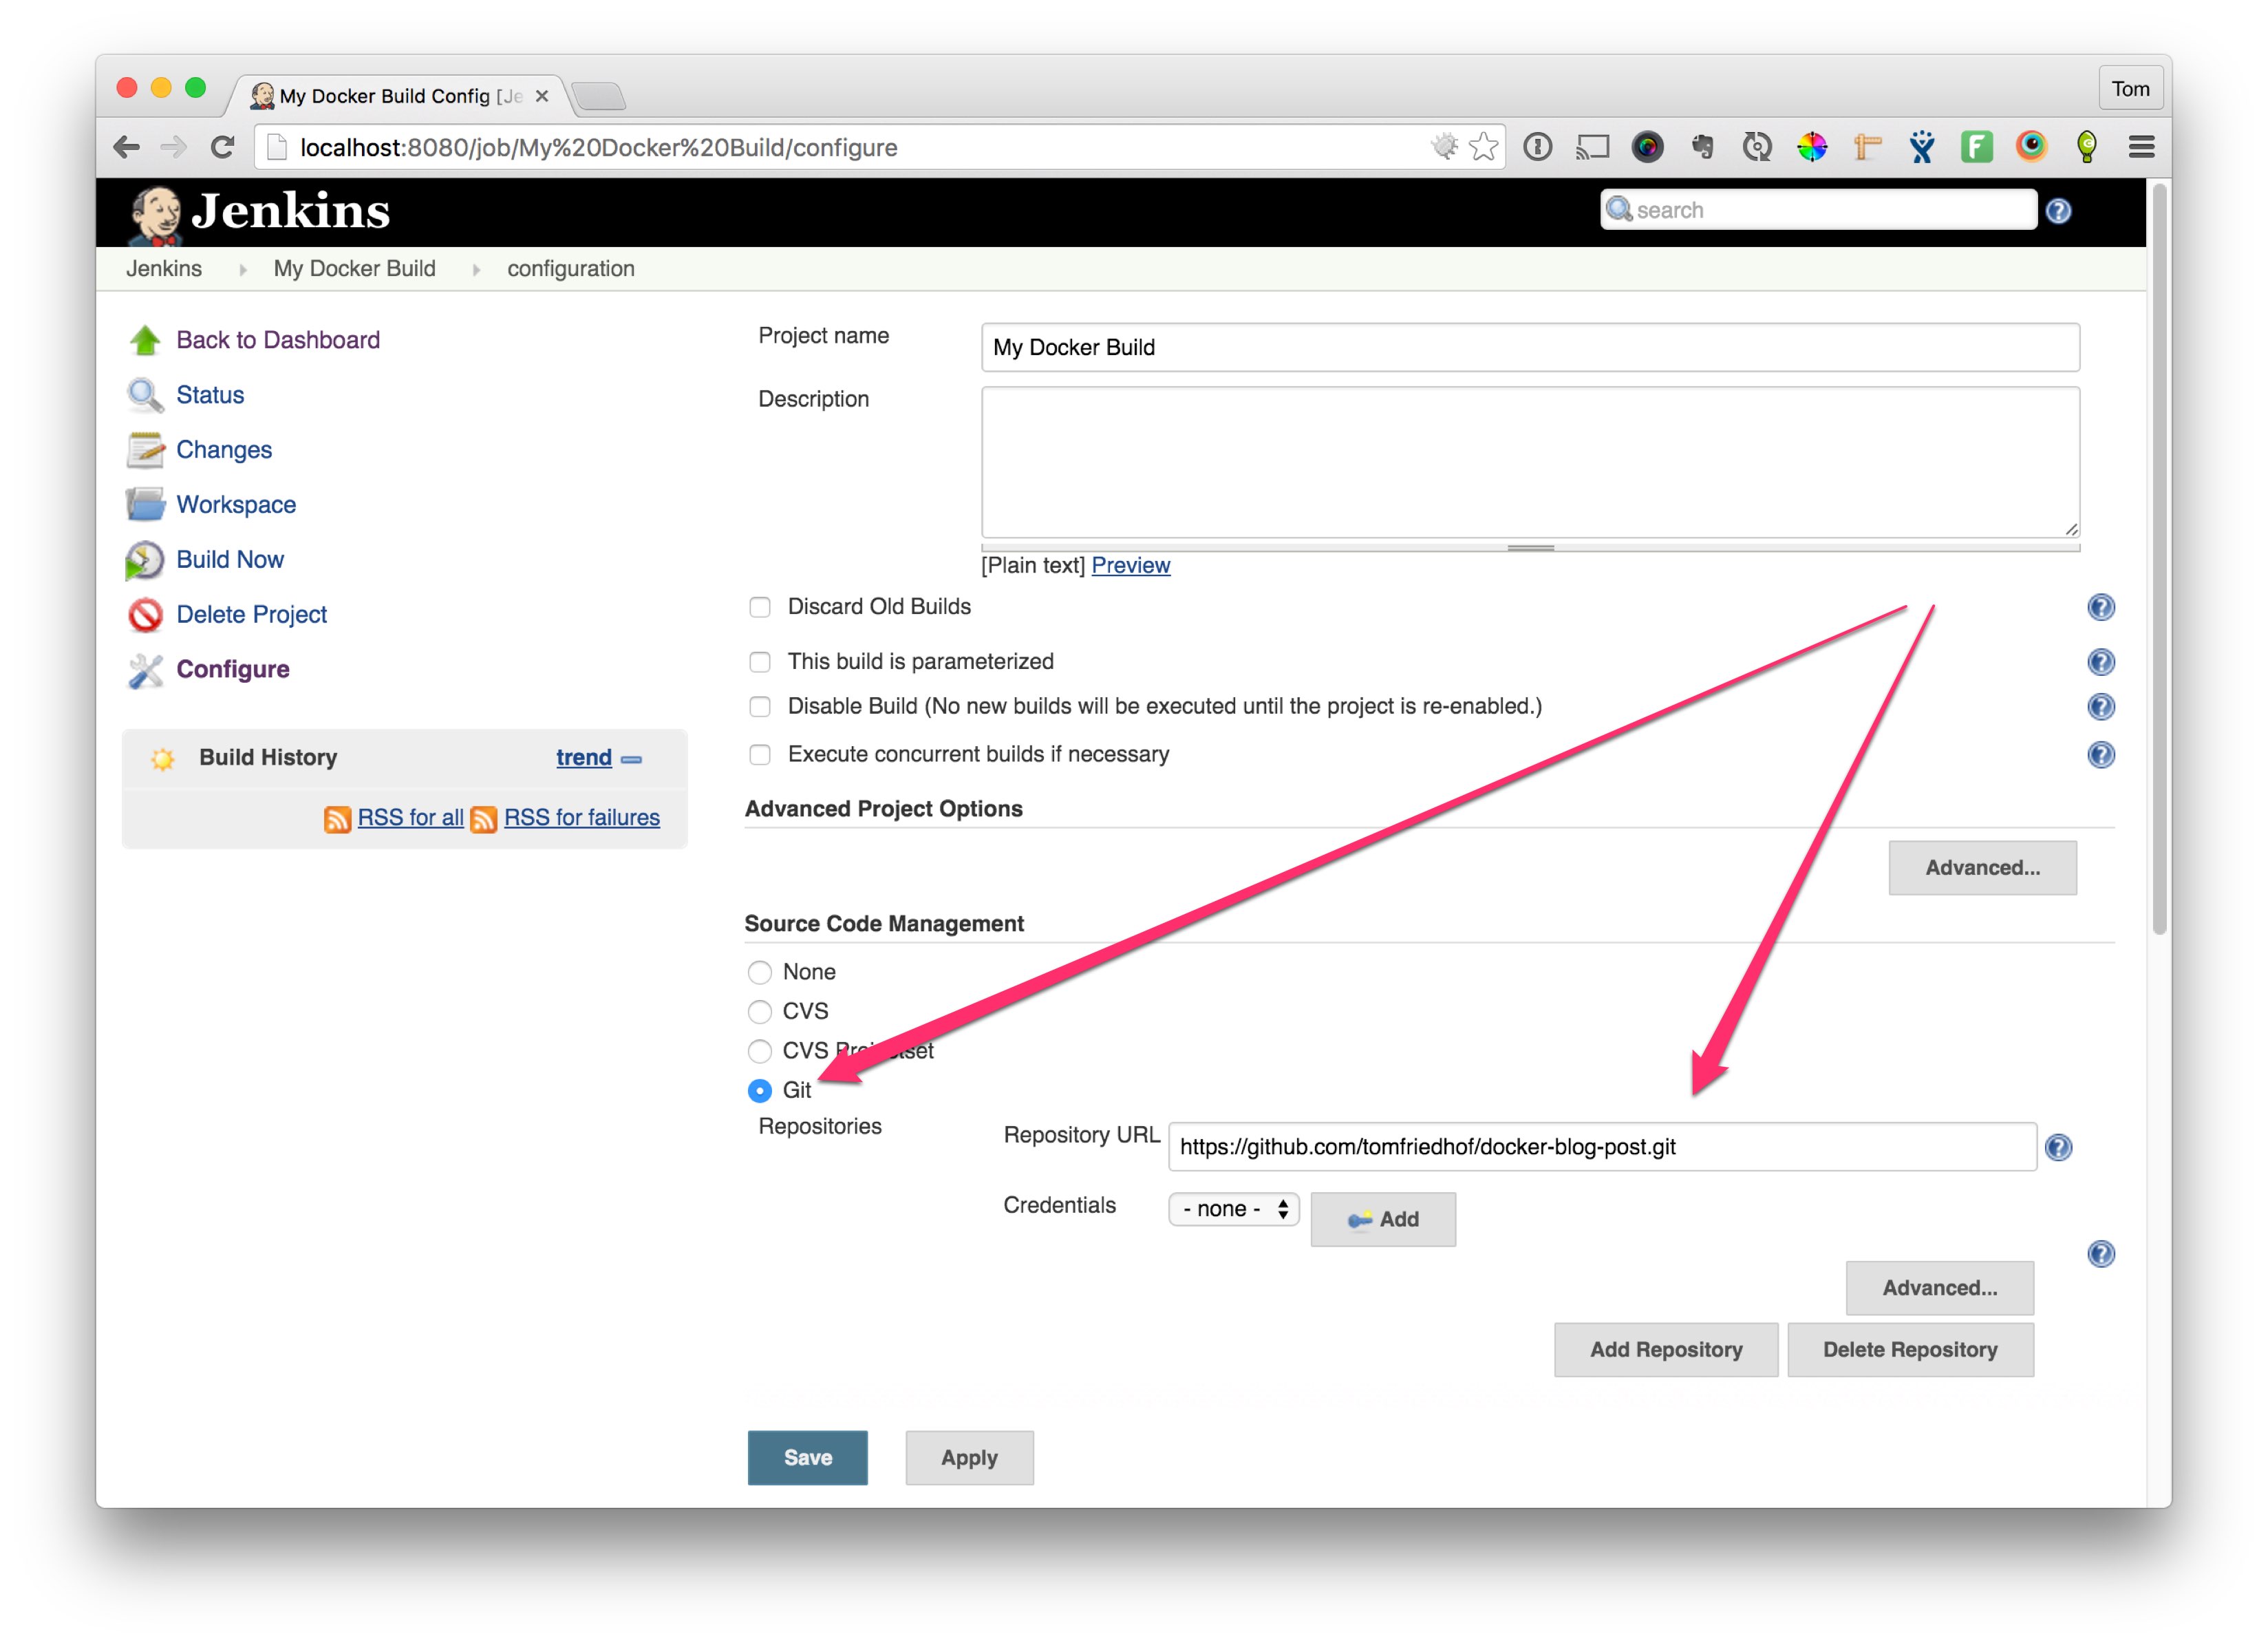
- Configure the git repo. We are going to configure Jenkins to pull code directly from your repository and build the Docker image from that.
- Add the build steps. Scroll down toward the bottom of the screen and click the arrow next to Add build step and choose Execute Shell. We are going to add three build steps as shown below. First we build the Docker image with
docker build -t="tomfriedhof/docker_blog_post" .(notice the trailing dot) and give it a name with the-tparameter, then we login to DockerHub, and finally push the newly created image that was created to DockerHub.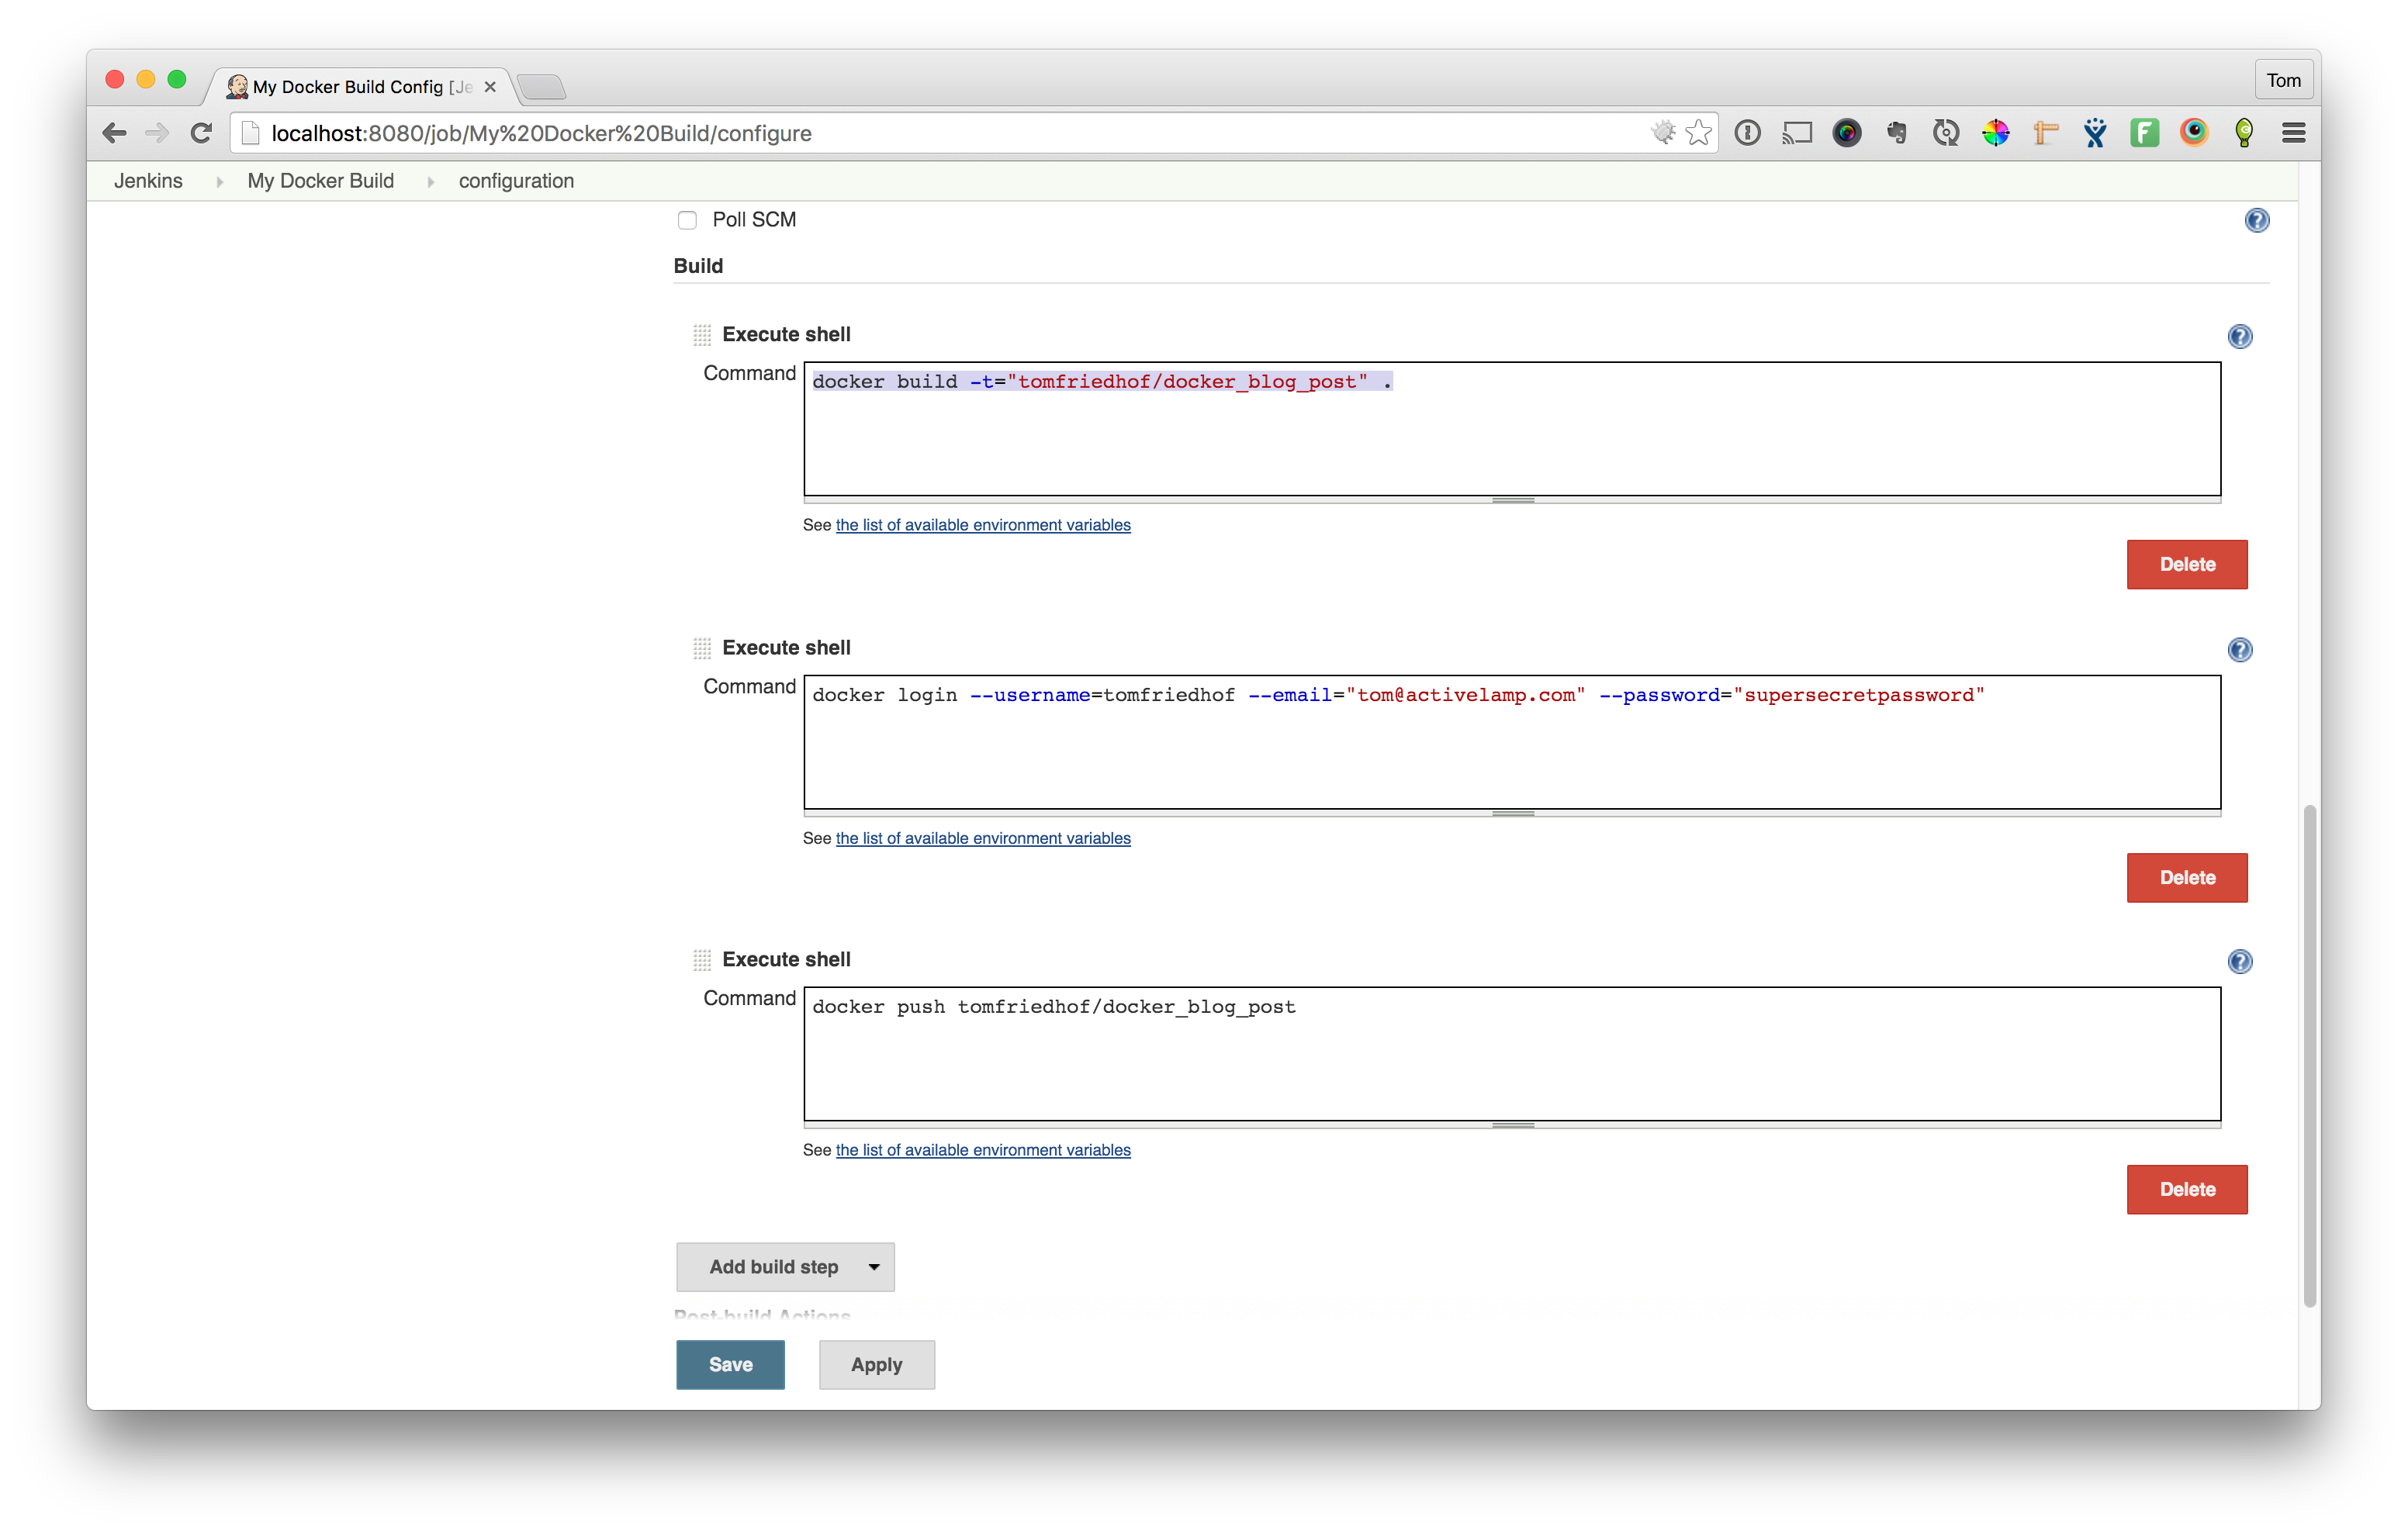
- Hit Save, then on the next screen hit the button that says Build Now
If everything went as planned, you should have a new Docker image posted on DockerHub: https://hub.docker.com/r/tomfriedhof/docker_blog_post/
Wrapping it up
There you have it, we now have an automated build that will automatically create and push Docker images to DockerHub. You can add on to this Jenkins job so that it polls your Github Repository so that it automatically runs this build anytime something changes in the tracking repo.
As another option, if you don't want to go through all the trouble of setting up your own Jenkins server just to do what I just showed you, DockerHub can do this for you. Go checkout their article on how to setup automated builds with Docker.
Now that we have a baked container with our application code within it, the next step is to deploy the container. That is the next post in this series. Stay tuned!
Authored by


Tom Friedhof
Senior Software Engineer