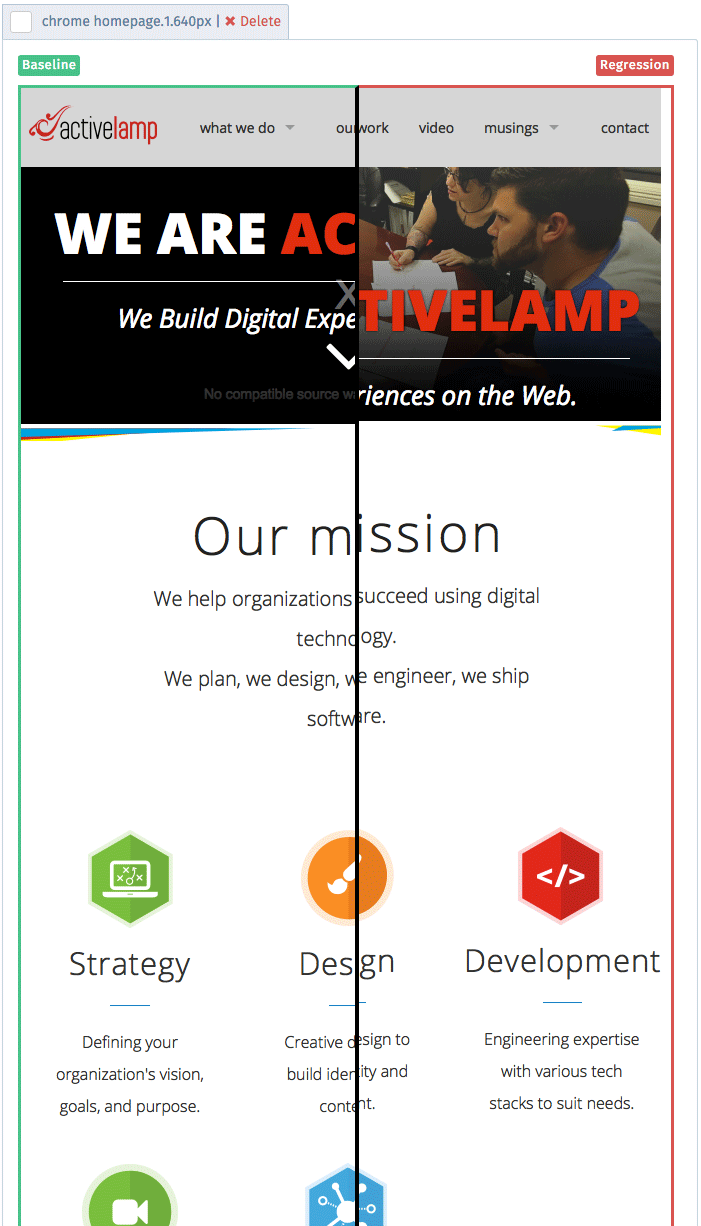
Shoov.io is a nifty website testing tool created by Gizra. We at ActiveLAMP were first introduced to Shoov.io at DrupalCon LA, in fact, Shoov.io is built on, you guessed it, Drupal 7 and it is an open source visual regression toolkit.
Shoov.io uses webdrivercss, graphicsmagick, and a few other libraries to compare images. Once the images are compared you can visually see the changes in the Shoov.io online app. When installing Shoov you can choose to install it directly into your project directory/repository or you can use a separate directory/repository to house all of your tests and screenshots. Initially when testing Shoov we had it contained in a separate directory but with our most recent project, we opted to install Shoov directly into our project with the hopes to have it run on a commit or pull request basis using Travis CI and SauceLabs.
##Installation
To get Shoov installed into your project, I will, for this install, assume that you want to install it into your project, navigate into your project using the terminal.
Install the Yeoman Shoov generator globally (may have to sudo)
npm install -g mocha yo generator-shoov
Make sure you have Composer installed globally
curl -sS https://getcomposer.org/installer | php
sudo mv composer.phar /usr/local/bin/composer
Make sure you have Brew installed (MacOSX)
ruby -e "$(curl -fsSL https://raw.githubusercontent.com/Homebrew/install/master/install)"Install GraphicsMagick (MacOSX)
brew install graphicsmagick
Next you will need to install dependencies if you don't have them already.
npm install -g yo
npm install -g file-type
Now we can build the test suite using the Yeoman generator*
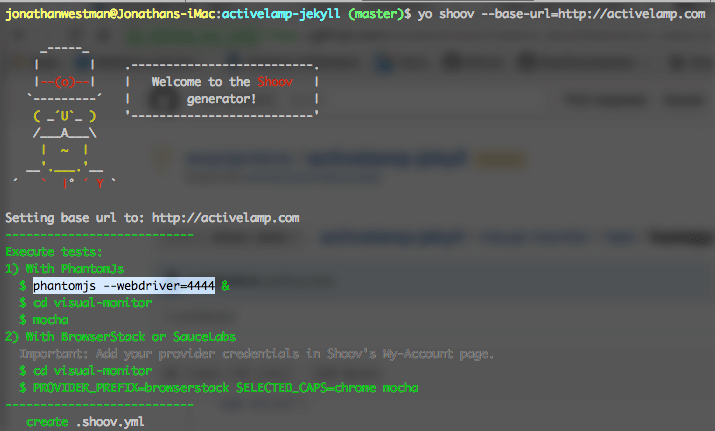
yo shoov --base-url=http://activelamp.com
*running this command may give you more dependencies you need to install first.
This generator will scaffold all of the directories that you need to start writing tests for your project. It will also give you some that you may not need at the moment, such as behat. You will find the example test within the directory test in the visual-monitor directory named test.js. We like to split our tests into multiple files so we might rename our test to homepage.js. Here is what the homepage.js file looks like when you first open it.
'use strict'

var shoovWebdrivercss = require('shoov-webdrivercss')

// This can be executed by passing the environment argument like this:
// PROVIDER_PREFIX=browserstack SELECTED_CAPS=chrome mocha
// PROVIDER_PREFIX=browserstack SELECTED_CAPS=ie11 mocha
// PROVIDER_PREFIX=browserstack SELECTED_CAPS=iphone5 mocha

var capsConfig = {
  chrome: {
    browser: 'Chrome',
    browser_version: '42.0',
    os: 'OS X',
    os_version: 'Yosemite',
    resolution: '1024x768',
  },
  ie11: {
    browser: 'IE',
    browser_version: '11.0',
    os: 'Windows',
    os_version: '7',
    resolution: '1024x768',
  },
  iphone5: {
    browser: 'Chrome',
    browser_version: '42.0',
    os: 'OS X',
    os_version: 'Yosemite',
    chromeOptions: {
      mobileEmulation: {
        deviceName: 'Apple iPhone 5',
      },
    },
  },
}

var selectedCaps = process.env.SELECTED_CAPS || undefined
var caps = selectedCaps ? capsConfig[selectedCaps] : undefined

var providerPrefix = process.env.PROVIDER_PREFIX
  ? process.env.PROVIDER_PREFIX + '-'
  : ''
var testName = selectedCaps
  ? providerPrefix + selectedCaps
  : providerPrefix + 'default'

var baseUrl = process.env.BASE_URL
  ? process.env.BASE_URL
  : 'http://activelamp.com'

var resultsCallback = process.env.DEBUG
  ? console.log
  : shoovWebdrivercss.processResults

describe('Visual monitor testing', function() {
  this.timeout(99999999)
  var client = {}

  before(function(done) {
    client = shoovWebdrivercss.before(done, caps)
  })

  after(function(done) {
    shoovWebdrivercss.after(done)
  })

  it('should show the home page', function(done) {
    client
      .url(baseUrl)
      .webdrivercss(
        testName + '.homepage',
        {
          name: '1',
          exclude: [],
          remove: [],
          hide: [],
          screenWidth: selectedCaps == 'chrome' ? [640, 960, 1200] : undefined,
        },
        resultsCallback
      )
      .call(done)
  })
})
##Modifications
We prefer not to repeat configuration in our projects. We move the configuration setup to a file outside of the test folder and require it. We make this file by copying and removing the config from the above file and adding module.exports for each of the variables. Our config file looks like this
var shoovWebdrivercss = require('shoov-webdrivercss')

// This can be executed by passing the environment argument like this:
// PROVIDER_PREFIX=browserstack SELECTED_CAPS=chrome mocha
// PROVIDER_PREFIX=browserstack SELECTED_CAPS=ie11 mocha
// PROVIDER_PREFIX=browserstack SELECTED_CAPS=iphone5 mocha

var capsConfig = {
  chrome: {
    browser: 'Chrome',
    browser_version: '42.0',
    os: 'OS X',
    os_version: 'Yosemite',
    resolution: '1024x768',
  },
  ie11: {
    browser: 'IE',
    browser_version: '11.0',
    os: 'Windows',
    os_version: '7',
    resolution: '1024x768',
  },
  iphone5: {
    browser: 'Chrome',
    browser_version: '42.0',
    os: 'OS X',
    os_version: 'Yosemite',
    chromeOptions: {
      mobileEmulation: {
        deviceName: 'Apple iPhone 5',
      },
    },
  },
}

var selectedCaps = process.env.SELECTED_CAPS || undefined
var caps = selectedCaps ? capsConfig[selectedCaps] : undefined

var providerPrefix = process.env.PROVIDER_PREFIX
  ? process.env.PROVIDER_PREFIX + '-'
  : ''
var testName = selectedCaps
  ? providerPrefix + selectedCaps
  : providerPrefix + 'default'

var baseUrl = process.env.BASE_URL
  ? process.env.BASE_URL
  : 'http://activelamp.com'

var resultsCallback = process.env.DEBUG
  ? console.log
  : shoovWebdrivercss.processResults

module.exports = {
  caps: caps,
  selectedCaps: selectedCaps,
  testName: testName,
  baseUrl: baseUrl,
  resultsCallback: resultsCallback,
}
Once we have this setup, we need to require it into our test and rewrite the variables from our test to make it work with the new configuration file. That file now looks like this.
'use strict'

var shoovWebdrivercss = require('shoov-webdrivercss')
var config = require('../configuration.js')

describe('Visual monitor testing', function() {
  this.timeout(99999999)
  var client = {}

  before(function(done) {
    client = shoovWebdrivercss.before(done, config.caps)
  })

  after(function(done) {
    shoovWebdrivercss.after(done)
  })

  it('should show the home page', function(done) {
    client
      .url(config.baseUrl)
      .webdrivercss(
        config.testName + '.homepage',
        {
          name: '1',
          exclude: [],
          remove: [],
          hide: [],
          screenWidth:
            config.selectedCaps == 'chrome' ? [640, 960, 1200] : undefined,
        },
        config.resultsCallback
      )
      .call(done)
  })
})
##Running the test Now we can run our test. For initial testing, if you don't have a BrowserStack account or SauceLabs, you can test using phantom js
Note: You must have a repository or the test will fail.
In another terminal window run:
phantomjs --webdriver=4444
Return to the original terminal window and run:
SELECTED_CAPS=chrome mocha
This will run the tests specified for "chrome" in the configuration file and the screenWidths from within each test as specified by the default test.
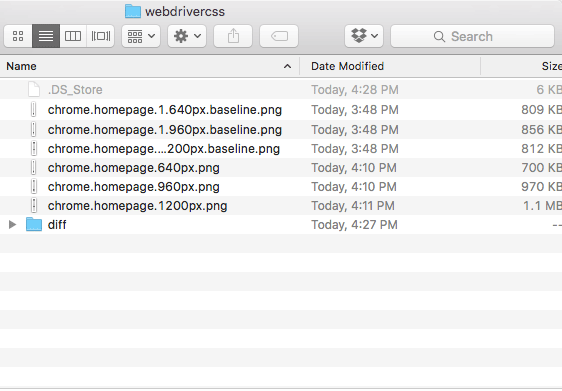
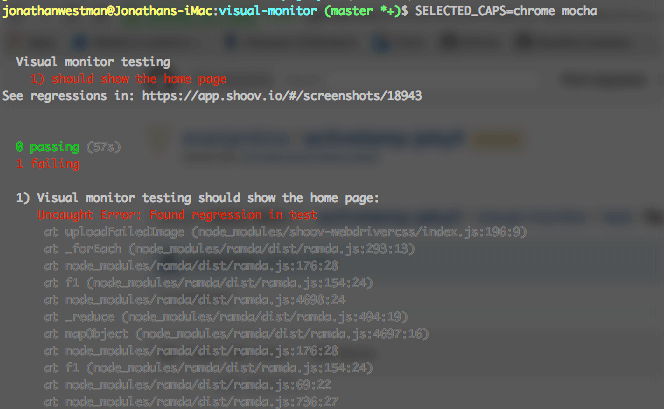
Once the test runs you should see that it has passed. Of course, our test passed because we didn't have anything to compare it to. This test will create your initial baseline images. You will want to review these images in the webdrivercss directory and decide if you need to fix your site, your tests, or both. You may have to remove, exclude or hide elements from your tests. Removing an element will completely rip it from the dom for the test and will shift your site around. Excluding will create a black box over the content that you want to not show up, this is great for areas that you want to keep a consistent layout and the item is a fixed size. Hiding an element will hide the element from view, works similar to remove but works better with child elements outside of the parent. Once you review the baseline images you may want to take the time to commit and push the new images to GitHub (this commit will be the one that appears in the interface later)
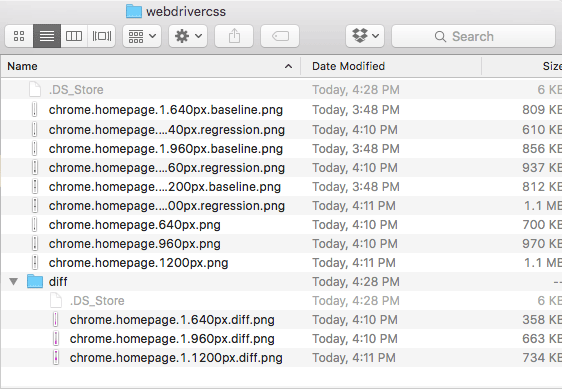
##Comparing the Regressions Once you modify your test or site you can test it against the baseline that exists. Now that you probably have a regression you can go to the Shoov interface. From within the interface, you will select Visual Regression. The commit from your project will appear in a list and you will click the commit to be able to view the regressions and take action on any other issues that exist or you can save your new baseline. Only images with a regression will show up in the interface and only tests with regressions will show up on the list.
##What's Next You can view the standalone GitHub repository here.
This is just the tip of the iceberg for us with Visual Regression testing. We hope to share more about our testing process and how we are using Shoov for our projects. Don't forget to share or comment if you like this post.

